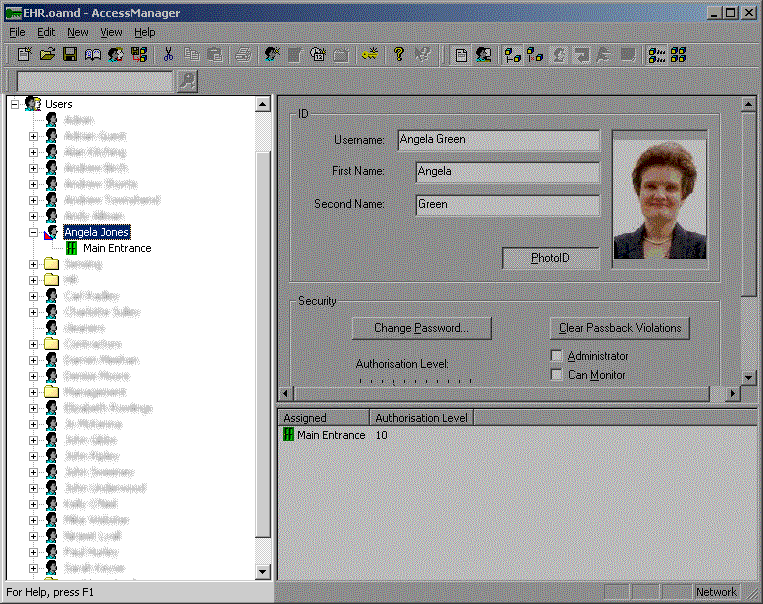

The tree pane shows the relationship of all the database objects. At the top of the tree are the root objects. These have no editable properties, but rather are used to categorise the database objects for ease of navigation around the database. Using the image above as an example:
Each object has a representative icon. It is possible for the assignments to be such
that if Access Manager did not limit the depth of the tree a branch could be expanded
indefinitely. At any point where the tree depth has been limited Access Manager will
display the deepest object using ![]() to tell you to look further up the branch for the object you wish to inspect or edit.
to tell you to look further up the branch for the object you wish to inspect or edit.
When you select a single object in the tree pane, the properties pane and the assignments pane will update to display the properties and assignments for that object, as can be seen above.
You can also select multiple objects using the standard Windows methods of CTRL-left click and SHIFT-left click, but only if the objects are in the same branch.
You can unselect an object by clicking on the object a second time.
A red flash indicates that an object is selected.
You will be warned if an object is about to be deleted permanently.
| !U! The objects immediately below the root objects in the hierarchy are special in that if you delete one it is deleted permanently. To delete an object locate it under its root object and press the Delete key. |
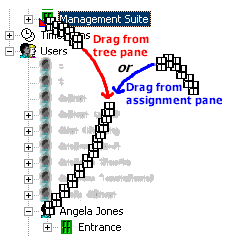
In the example shown pressing Delete will delete door Management Suite.
 |
!U! To create an assignment either:
or
|
In the example shown the door Management Suite will be assigned to the user Angela Jones.
Either (recommended option):
Or:
Then:
Where the object cannot be assigned to anything other than the object it is assigned to, it will be deleted rather than the association being removed. You will be warned if an object is about to be deleted permanently.
 |
!U! To unassign one or more object(s) from a user:
|
In the example shown pressing Delete will unassign two doors from Angela Jones.
Either (recommended option):
Or:
Then: